Consuming a RESTful Web Service in Android App - Part 2

In this part of the tutorial, we will create an Android application and consume the API that we've built in the previous part. This tutorial consists of two parts:
- Creating a RESTful API with ASP.NET - (Part 1)
- Consuming the RESTful API in Android App - (This Post)
You can find the source code for this part on Github/NotesAPP
Step 1: Creating an Android Project
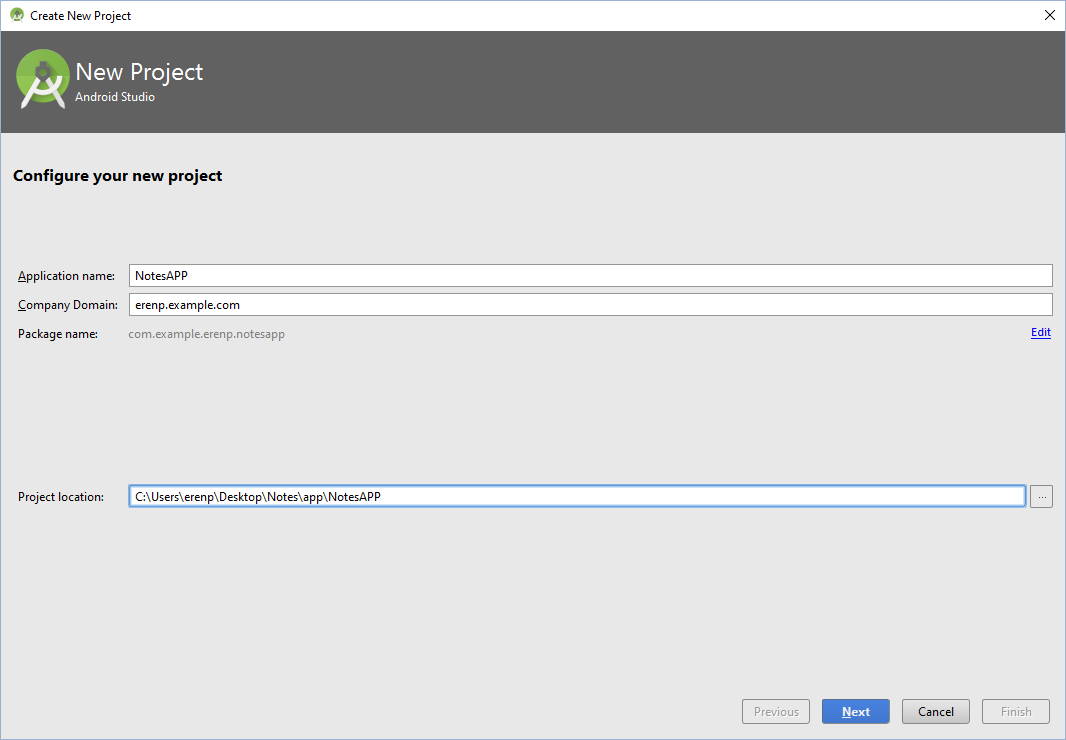
Open your Android Studio, and then select File -> New -> New Project. You can name the application "NotesAPP". As the project location, we will use the app folder that we've created in the previous part. Click Next.
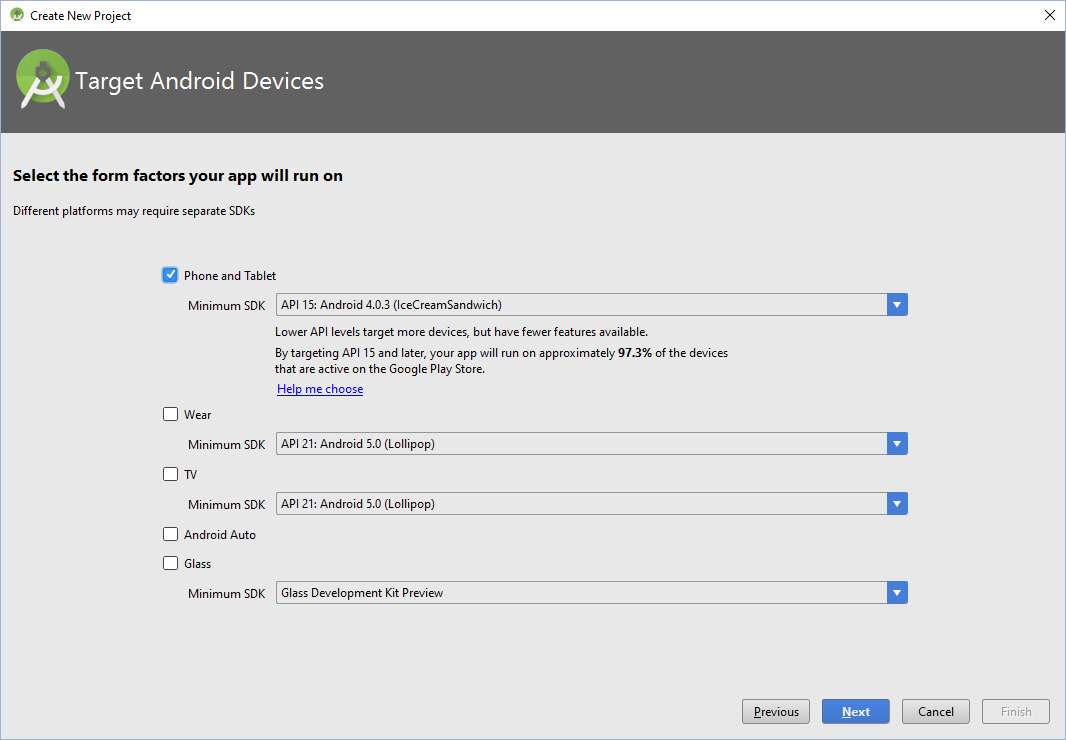
In the next window, we will choose minimum and maximum SDK versions. We don't need to change anything here. Click Next.
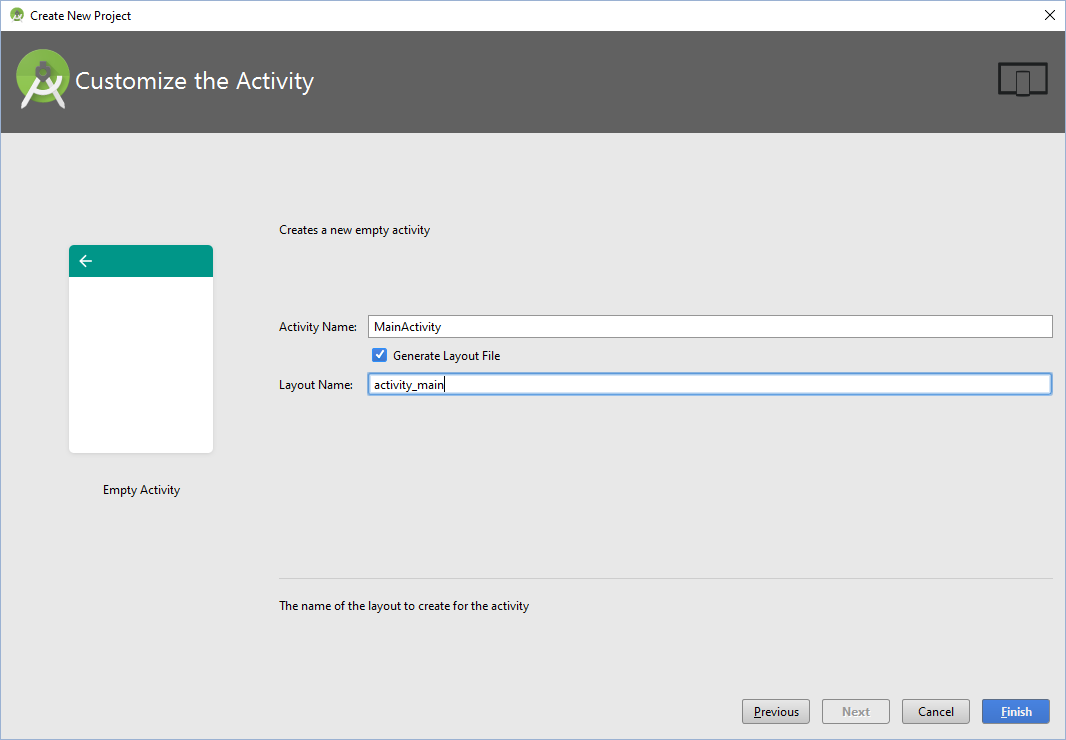
Next, we will create our first Activity. Leave the activity name as "MainActivity" and the layout name as "activity_main". Click Finish.
Step 2: Adding a Model (POJO)
We will create a model that represents a simple note and use it to deserialize and display JSON response data. You can find detailed information about Plain Old Java Object (POJO) here.
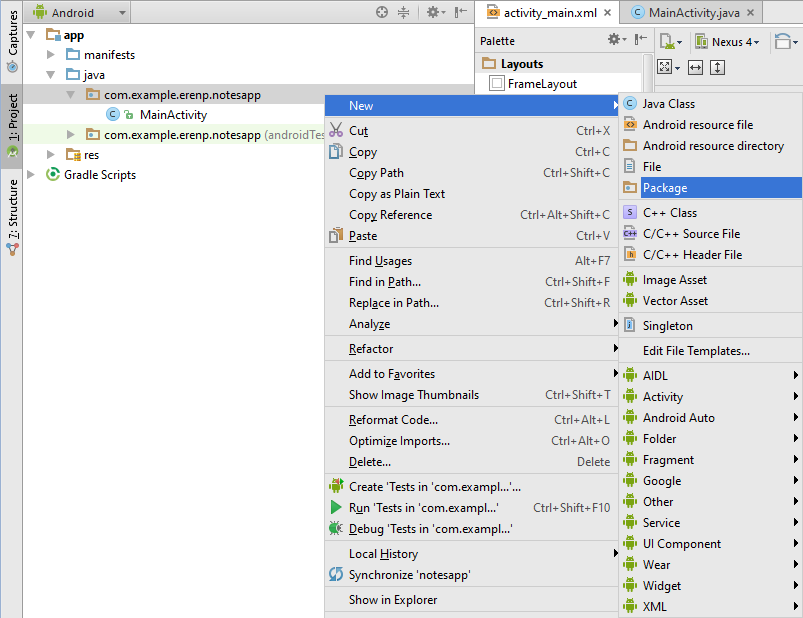
In Project Browser, right-click on app -> java -> com.[your project package], and then select New -> Package. Name the package "models" and Click OK.
Right-click on the models folder you've created, and then select New -> Java Class. Name the class "Note". Replace the generated code with:
package com.example.erenp.notesapp.models;

import org.json.JSONException;
import org.json.JSONObject;

public class Note {

    private String Id;
    private String Title;
    private String Content;

    public Note(JSONObject object) {
        try {
            this.Id = object.getString("id");
            this.Title = object.getString("title");
            this.Content = object.getString("content");
        } catch (JSONException e) {
            e.printStackTrace();
        }
    }

    public Note(String Title, String Content) {
        this.Title = Title;
        this.Content = Content;
    }

    public String getId() {
        return this.Id;
    }

    public String getTitle() {
        return this.Title;
    }

    public void setTitle(String title) {
        this.Title = title;
    }

    public String getContent() {
        return this.Content;
    }

    public void setContent(String content) {
        this.Content = content;
    }
}
Step 3: Adding a Custom Adapter
In order to display notes, we need a custom ArrayAdapter. First, we will create a simple layout that represents a note item.
In Project Browser, right-click on app -> res -> layout, and then select New -> Layout resource file. Name the file "item_note.xml" and click OK.
Open item_note.xml you've created. Switch to Text mode, and replace the generated code with:
<?xml version="1.0" encoding="utf-8"?>
<RelativeLayout xmlns:android="http://schemas.android.com/apk/res/android"
    xmlns:app="http://schemas.android.com/apk/res-auto"
    xmlns:tools="http://schemas.android.com/tools"
    android:layout_width="match_parent"
    android:layout_height="match_parent"
    android:paddingBottom="@dimen/activity_vertical_margin"
    android:paddingLeft="@dimen/activity_horizontal_margin"
    android:paddingRight="@dimen/activity_horizontal_margin"
    android:paddingTop="@dimen/activity_vertical_margin">

    <TextView
        android:id="@+id/label_note_id"
        android:layout_width="wrap_content"
        android:layout_height="wrap_content"
        android:text="@string/label_note_id" />

    <TextView
        android:id="@+id/value_note_id"
        android:layout_width="wrap_content"
        android:layout_height="wrap_content"
        android:layout_alignLeft="@+id/value_note_title"
        android:layout_alignTop="@+id/label_note_id" />

    <TextView
        android:id="@+id/label_note_title"
        android:layout_width="wrap_content"
        android:layout_height="wrap_content"
        android:layout_below="@+id/label_note_id"
        android:layout_marginTop="12dp"
        android:text="@string/label_note_title" />

    <TextView
        android:id="@+id/value_note_title"
        android:layout_width="wrap_content"
        android:layout_height="wrap_content"
        android:layout_alignTop="@+id/label_note_title"
        android:layout_marginLeft="12dp"
        android:layout_toRightOf="@+id/label_note_title" />
</RelativeLayout>
Now we need to take care of those string resource errors. Open strings.xml file, and add following:
<resources>
    <string name="app_name">Notes</string>

    <string name="label_note_id">Note Id</string>
    <string name="label_note_title">Note Title</string>
</resources>
Let's create our custom ArrayAdapter now.
In Project Browser, right-click on app -> java -> com.[your project package], and then select New -> Package. Name the package "adapters" and Click OK.
Right-click on adapters folder you've created, and the select New -> Java Class. Name the class "NoteAdapter" and click OK. Replace the generated code with:
package com.example.erenp.notesapp.adapters;

import android.content.Context;
import android.view.LayoutInflater;
import android.view.View;
import android.view.ViewGroup;
import android.widget.ArrayAdapter;
import android.widget.TextView;

import com.example.erenp.notesapp.R;
import com.example.erenp.notesapp.models.Note;

import java.util.ArrayList;

public class NoteAdapter extends ArrayAdapter<Note> {
    private static class ViewHolder {
        TextView id;
        TextView title;
    }

    public NoteAdapter(Context context, ArrayList<Note> notes) {
        super(context, R.layout.item_note, notes);
    }

    @Override
    public View getView(int position, View convertView, ViewGroup parent) {
        Note note = getItem(position);
        ViewHolder viewHolder;

        if (convertView == null) {
            viewHolder = new ViewHolder();

            LayoutInflater inflater = LayoutInflater.from(getContext());
            convertView = inflater.inflate(R.layout.item_note, parent, false);

            viewHolder.id = (TextView) convertView.findViewById(R.id.value_note_id);
            viewHolder.title = (TextView) convertView.findViewById(R.id.value_note_title);

            convertView.setTag(viewHolder);
        } else {
            viewHolder = (ViewHolder) convertView.getTag();
        }

        viewHolder.id.setText(note.getId());
        viewHolder.title.setText(note.getTitle());

        return convertView;
    }
}
Step 4: Create an Async HTTP Client
In order to call our API, we will use LoopJ's (James Smith) Android Asynchronous Http Client. This is an asynchronous, call-back based HTTP client built on top of Apache’s HttpClient libraries. With this library, we can make requests outside of the main UI thread. To install this library, we need to add maven dependency using Gradle buildscript in format:
dependencies {
  compile 'com.loopj.android:android-async-http:1.4.9'
}
We need to Synchronize Gradle buildscript (build.gradle) to suppress import errors.
In Project Browser, right-click on app -> java -> com.[your project package], and then select New -> Package. Name the package "clients" and Click OK.
Right-click on clients folder you've created, and then select New -> Java Class. Name the class "NoteRestClient". Replace the generated code with:
package com.example.erenp.notesapp.clients;

import android.content.Context;

import com.loopj.android.http.AsyncHttpClient;
import com.loopj.android.http.AsyncHttpResponseHandler;
import com.loopj.android.http.RequestParams;

import cz.msebera.android.httpclient.Header;

public class NoteRestClient {
    private static final String BASE_URL = "http://192.168.1.82:5000/";

    private static AsyncHttpClient client = new AsyncHttpClient();

    public static void get(Context context, String url, Header[] headers, RequestParams params,
                           AsyncHttpResponseHandler responseHandler) {
        client.get(context, getAbsoluteUrl(url), headers, params, responseHandler);
    }

    private static String getAbsoluteUrl(String relativeUrl) {
        return BASE_URL + relativeUrl;
    }
}
Be sure to update BASE_URL with your LAN IP.
Step 5: Create and Populate the Note List
In this step, we will create a ListView, and then populate it with the data from the API. Let's start by creating a ListView.
Open activity_main.xml file, and then add a new ListView. Set the android:id value to "list_notes".
<?xml version="1.0" encoding="utf-8"?>
<RelativeLayout xmlns:android="http://schemas.android.com/apk/res/android"
    xmlns:tools="http://schemas.android.com/tools"
    android:layout_width="match_parent"
    android:layout_height="match_parent"
    android:paddingBottom="@dimen/activity_vertical_margin"
    android:paddingLeft="@dimen/activity_horizontal_margin"
    android:paddingRight="@dimen/activity_horizontal_margin"
    android:paddingTop="@dimen/activity_vertical_margin"
    tools:context="com.example.erenp.notesapp.MainActivity">

    <ListView
        android:id="@+id/list_notes"
        android:layout_width="match_parent"
        android:layout_height="match_parent" />
</RelativeLayout>
Now we will make a GET request to our API and populate the list with the returned data. Open MainActivity.java, and then replace the generated code with:
package com.example.erenp.notesapp;

import android.os.Bundle;
import android.support.v7.app.AppCompatActivity;
import android.widget.ListView;

import com.example.erenp.notesapp.adapters.NoteAdapter;
import com.example.erenp.notesapp.clients.NoteRestClient;
import com.example.erenp.notesapp.models.Note;
import com.loopj.android.http.JsonHttpResponseHandler;

import org.json.JSONArray;
import org.json.JSONException;

import java.util.ArrayList;
import java.util.List;

import cz.msebera.android.httpclient.Header;
import cz.msebera.android.httpclient.message.BasicHeader;

public class MainActivity extends AppCompatActivity {

    private ListView noteList;

    @Override
    protected void onCreate(Bundle savedInstanceState) {
        super.onCreate(savedInstanceState);
        setContentView(R.layout.activity_main);

        getNotes();
    }

    private void getNotes() {
        List<Header> headers = new ArrayList<Header>();
        headers.add(new BasicHeader("Accept", "application/json"));

        NoteRestClient.get(MainActivity.this, "api/notes", headers.toArray(new Header[headers.size()]),
                null, new JsonHttpResponseHandler() {
                    @Override
                    public void onSuccess(int statusCode, Header[] headers, JSONArray response) {
                        ArrayList<Note> noteArray = new ArrayList<Note>();
                        NoteAdapter noteAdapter = new NoteAdapter(MainActivity.this, noteArray);

                        for (int i = 0; i < response.length(); i++) {
                            try {
                                noteAdapter.add(new Note(response.getJSONObject(i)));
                            } catch (JSONException e) {
                                e.printStackTrace();
                            }
                        }

                        noteList = (ListView) findViewById(R.id.list_notes);
                        noteList.setAdapter(noteAdapter);
                    }
                });
    }
}
We are telling the server that we are expecting the data in "application/json" format.
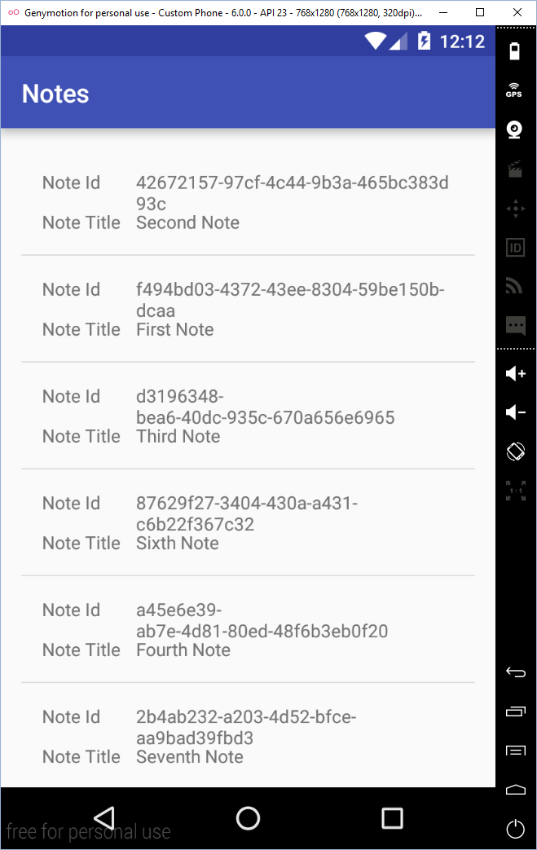
Final Step: Testing the Application
Before we begin testing, we need to add a special permission to our application. Open AndroidManifest.xml file, and then add:
<uses-permission android:name="android.permission.INTERNET"/>
Now we are ready to test our application. I will use Genymotion emulator as the testing platform. You can choose any other AVD or an actual Android device.
Go back to Visual Studio and run your server (CTRL + F5). In Android Studio, press SHIFT + F10 to run your application. Select your emulator or device from the list.
This is the final result.